
In today’s fast-paced world, webinars have become an indispensable tool for learning, knowledge sharing, and business communication. They enable us to attend seminars, workshops, and presentations from the comfort of our homes or offices, bridging geographical gaps and transcending time zones. However, the constraint of real-time attendance can often be a hurdle, especially when our schedules clash or when life’s demands take precedence.
That’s where the magic of webinar recordings comes into play. The ability to record webinars allows us to break free from the shackles of time and location, empowering us to capture the knowledge, insights, and discussions that unfold during these virtual events. Whether you’re a student eager to revisit a missed lecture, a professional striving to stay updated with industry trends, or a business owner looking to leverage webinars for marketing and training purposes, the ability to record webinars is a game-changer.
In this comprehensive guide, we will explore six easy methods to record webinars effectively. Each method offers its unique set of advantages and limitations, catering to a diverse range of needs and technical proficiency levels. From built-in webinar recording tools to screen recording software, browser extensions, dedicated webinar recording software, cloud-based recording services, and mobile apps, there’s a method suitable for everyone.
Our journey through these six methods will equip you with the knowledge and tools needed to capture the essence of webinars, ensuring you never miss out on valuable content again. Whether you’re a webinar enthusiast, a lifelong learner, or a business professional seeking to enhance your digital presence, this guide is your gateway to unlocking the power of webinar recordings.
So, let’s dive in and discover how you can harness these methods to record webinars with ease, flexibility, and convenience, ensuring that the wealth of knowledge shared in these virtual gatherings remains accessible to you whenever and wherever you need it. Get ready to take control of your learning, professional development, and business growth as we delve into the art of recording webinars.
Using Built-in Webinar Recording Tools

When it comes to capturing the valuable content of webinars, one of the most straightforward methods is to utilize the built-in webinar recording tools that are often available within many webinar platforms. These built-in features are tailored to make the process of recording your chosen webinar as effortless as possible.
Pros:
- Convenient and user-friendly.
- Often included in the subscription.
- Recording is synchronized with the presentation.
Cons:
- Limited editing capabilities.
- Storage constraints on the platform.
- May not be available on all webinar platforms.
Main Features:
- One-click recording.
- Automatic saving to the cloud or local storage.
- Option to pause and resume recording.
Step-by-step instructions for using built-in webinar recording tools:
- Log in to your webinar platform.
- Join the webinar as an attendee.
- Look for a “Record” button or option.
- Click “Record” to start capturing the webinar.
- To end the recording, click “Stop” or follow platform-specific instructions.
- Access the recorded webinar in your account for playback or download.
Screen Recording Software
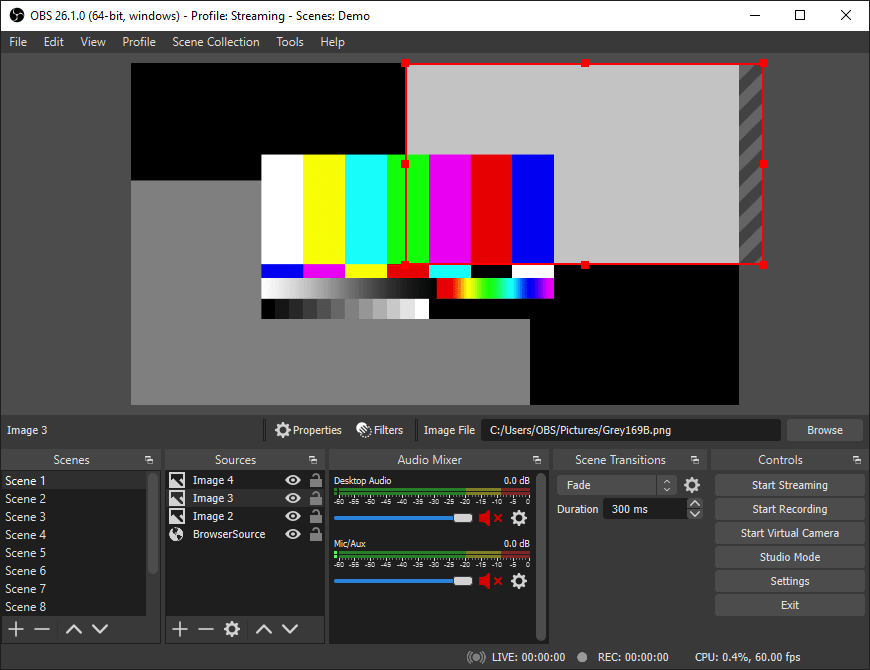
When it comes to capturing digital content in its entirety, screen recording software emerges as a versatile and indispensable tool. This method offers flexibility and adaptability, making it suitable for various purposes, from recording webinars and online presentations to creating tutorials or preserving important digital moments.
Screen recording software essentially functions as a digital camcorder for your computer screen. It allows you to capture not just what you see but also what you hear, making it an ideal choice for recording webinars, especially when built-in tools or browser extensions may not suffice.
One of the significant advantages of screen recording software is its potential for post-recording editing. While the primary purpose is to record, many screen recording tools come equipped with built-in editing features that allow you to enhance your recordings. This can include adding annotations, captions, highlights, or even cutting out unwanted sections.
Screen recording software caters to a broad audience, from educators looking to create engaging online lessons to professionals conducting webinars and businesses seeking to produce high-quality promotional content. It empowers users with the ability to create polished and informative video content that can be shared, stored, or repurposed for various purposes.
Pros:
- Works with any webinar platform.
- Full control over recording settings.
- Ability to edit and enhance recordings.
Cons:
- Requires separate software installation.
- May consume more computer resources.
- Manual setup and configuration.
Main Features:
- Customizable recording area.
- Multiple output formats (MP4, AVI, etc.).
- Real-time editing with annotations and highlights.
Use the instructions below with screen recording software:
- Download and install screen recording software (e.g., OBS Studio, Camtasia, or ShareX).
- Launch the software and configure recording settings (e.g., audio source and video quality).
- Open the webinar platform and join the webinar.
- Adjust the recording area to capture the webinar screen.
- Start recording when the webinar begins.
- Stop recording when the webinar ends.
- Edit and save the recorded webinar as needed.
Browser Extensions

If you’re looking for a quick and hassle-free way to record webinars directly from your web browser, browser extensions can be a valuable method to consider. These extensions are essentially small software programs that can be added to your browser to enhance its functionality.
Pros:
- Easy installation and setup.
- No need for additional software.
- Often offers basic editing options.
Cons:
- Limited functionality compared to dedicated software.
- May not be available for all browsers.
- Quality may vary depending on the extension.
Main Features:
- Quick recording initiation.
- On-screen controls for pause and stop.
- Auto-saving to your computer.
Step-by-step instructions for recording screen with browser extensions:
- Search for and install a browser extension for screen recording (e.g., Loom, Screencastify, or Nimbus Screenshot & Screen Video Recorder).
- Launch the extension.
- Open the webinar in your browser.
- Click on the extension icon and choose the recording options.
- Start recording when the webinar begins.
- Stop recording when the webinar ends.
- Access and edit the recorded file as needed.
Dedicated Webinar Recording Software
Dedicated webinar recording software is a category of specialized tools explicitly created for capturing webinar content. Unlike generic screen recording software, these solutions are tailored to the unique needs and requirements of webinar hosts and attendees.
Pros:
- Optimized for webinar recording.
- Enhanced features like automatic scheduling.
- Better quality recordings.
Cons:
- Often comes at an additional cost.
- May require a learning curve for setup.
- Platform-specific.
Main Features:
- Integration with popular webinar platforms.
- Advanced recording settings (e.g., recording multiple webcams).
- Post-recording editing and sharing options.
That’s how you record webinars with dedicated software:
- Purchase and install dedicated webinar recording software (e.g., GoToWebinar, Zoho Meeting, or Demio).
- Set up your account and configure webinar settings.
- Schedule or join the webinar using the software.
- Start recording before the webinar begins.
- End the recording when the webinar concludes.
- Access and edit the recorded webinar within the software.
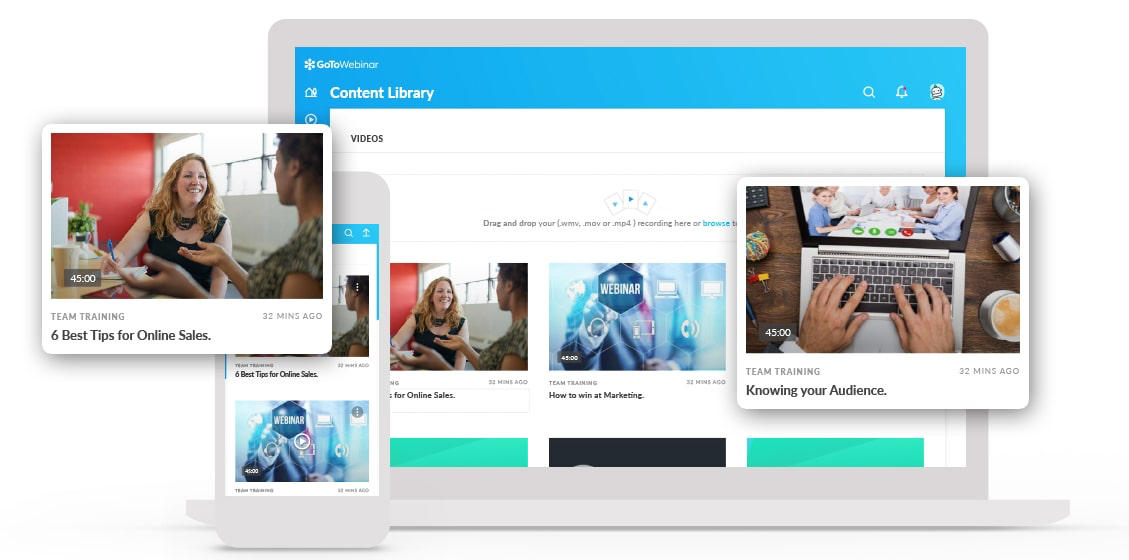
Cloud-Based Recording Services

For those who prefer a cloud-centric approach to webinar recording, cloud-based recording services offer an attractive solution. These services leverage cloud storage to store your recorded webinars, eliminating the need to worry about local storage limitations.
Pros:
- No need to install software.
- Unlimited storage in the cloud.
- Accessibility from any device.
Cons:
- Limited customization options.
- May require a subscription.
- Internet-dependent for recording and playback.
Main Features:
- Cloud storage with automatic syncing.
- Sharing options for recorded webinars.
- Integration with popular webinar platforms.
Follow the instructions below to record a webinar with cloud-based recording services:
- Sign up for a cloud-based recording service (e.g., Zoom, Microsoft Stream, or Vimeo).
- Access your account and configure recording settings if necessary.
- Schedule or join the webinar as usual.
- Start recording within the webinar platform.
- The recording will automatically sync to your cloud storage.
- Share or download the recorded webinar as needed.
Mobile Apps
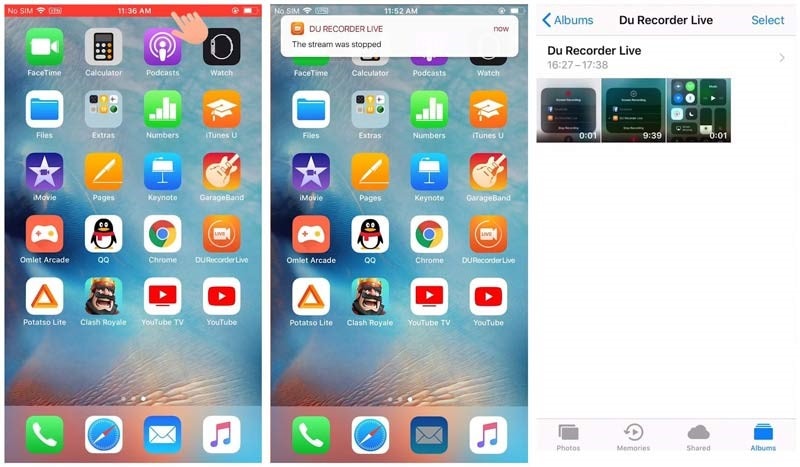
In a mobile-centric world, it’s no surprise that mobile apps have emerged as a convenient method for recording webinars. These apps are designed to run on smartphones and tablets, allowing you to capture webinar content while on the move. Whether you’re a student, professional, or business owner, mobile apps can provide flexibility and portability in recording webinars.
Pros:
- Portability and convenience.
- No need for a computer.
- User-friendly interfaces.
Cons:
- Limited editing capabilities.
- Smaller screen may impact quality.
- May require additional storage space.
Main Features:
- Mobile-friendly recording controls.
- Built-in sharing options.
- Automatic saving to your device.
Here’s how-to record a webinar with a mobile screen recorder:
- Download a webinar recording app from your device’s app store (e.g., AZ Screen Recorder, ScreenFlow, or DU Recorder).
- Install and open the app.
- Join the webinar using the app’s browser or through the webinar platform’s mobile app.
- Start recording when the webinar begins.
- Stop recording when the webinar ends.
- Access and share the recorded webinar from your mobile device.
In conclusion, recording webinars is a valuable skill and necessity in today’s fast-paced world of online learning, business, and communication. Whether you’re a student striving to catch up on missed lectures, a professional aiming to stay updated with industry trends, or a business owner looking to leverage webinars for marketing and training purposes, these six easy ways to record webinars provide you with the flexibility and convenience you need.
Each method comes with its own set of advantages and limitations, making it essential to choose the one that aligns best with your specific requirements and technical expertise. If you’re looking for simplicity and user-friendliness, built-in webinar recording tools and browser extensions can be your go-to options. They require minimal setup and are suitable for casual users.
For those seeking more control and customization, screen recording software and dedicated webinar recording software offer advanced features and editing capabilities. While they may involve a steeper learning curve, the results are often worth the effort, especially if you need to produce high-quality recordings or plan to use webinars extensively.
Cloud-based recording services provide a seamless experience with the benefit of unlimited cloud storage, making them ideal for those concerned about storage limitations. They’re particularly handy for businesses and organizations that require easy sharing and accessibility of recorded content.
Mobile apps, on the other hand, cater to individuals on the move. They allow you to capture webinars using your smartphone or tablet, providing portability and convenience. While they might not offer the same level of editing options as dedicated software, they serve as a practical solution when you need to record on the go.
In the ever-evolving landscape of online communication and learning, the ability to record webinars empowers you to take control of your schedule and access valuable content at your convenience. Whether you’re a student, a professional, or an entrepreneur, having these recording methods in your toolkit ensures that you can make the most of webinars without the constraints of time and place.
Remember that the choice of method ultimately depends on your specific needs, preferences, and technical proficiency. Experiment with different approaches to discover which one works best for you. With the right method and a bit of practice, you’ll find that recording webinars is not only straightforward but also a powerful way to enhance your learning, stay informed, and boost your professional growth.
So, the next time you find yourself unable to attend a live webinar, don’t fret. Simply choose one of these six methods, and you’ll be well on your way to recording and revisiting valuable webinar content, ensuring that you don’t miss out on any opportunity to expand your knowledge and skills.

Starting as an engineering expert, my journey has been marked by a ceaseless quest for knowledge and the acquisition of diverse skills. Currently, I work in the realm of technical support for a renowned video editing software provider and I possesses a wealth of expertise spanning virtually every aspect required for professional post-production work.